Shopify has a storage limit for stores, and when you reach this limit, you have two options. The first option is to upgrade your plan, and the second option is to remove unused and unnecessary files to free up space on your store. Below you can see the storage limit by plan.
| Plan | Limit per store |
|---|---|
| Starter | 100 GB (gigabyte) |
| Retail | 100 GB (gigabyte) |
| Basic | 100 GB (gigabyte) |
| Grow | 300 GB (gigabyte) |
| Advanced | 500 GB (gigabyte) |
| Plus | 1 TB (terabyte) |
| Enterprise | 10 TB (terabyte) |
Upgrading the plan is not an easy option, as it requires a higher subscription fee. Therefore, let’s focus on how we can clean up the storage by deleting unnecessary files from our store.
Deleting unused files
Step 1: Navigate to Content -> Files in the left menu of the Shopify Admin.
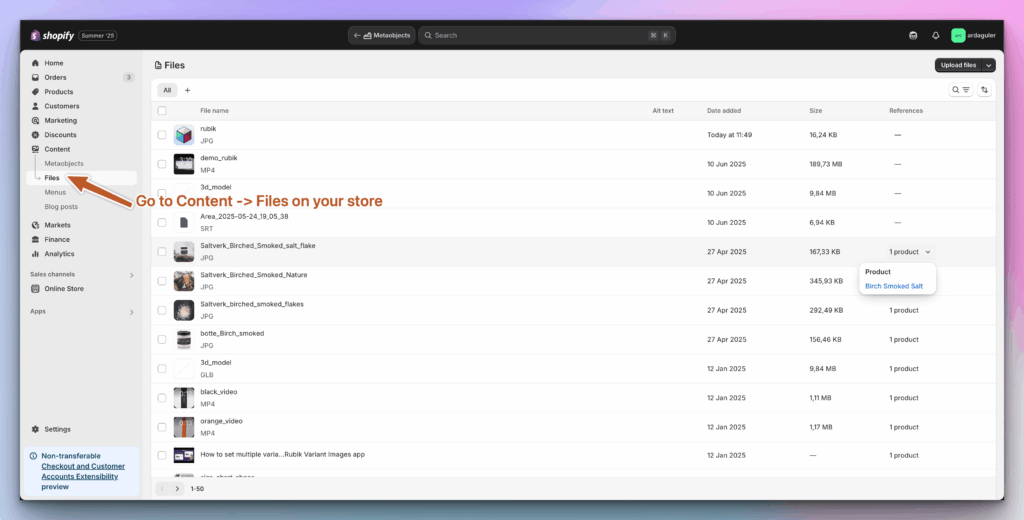
On the Files page, you will see all files that have been uploaded to your store. These files are the most significant contributors to your storage usage, and if you can remove the ones that you know are unnecessary, you can resolve the storage issue. But detecting which ones are unused anywhere is challenging and not straightforward.
⚠️ Shopify recently added the “References” column to the files pages to help merchants understand where the files are being used. Still, unfortunately, this column works only if the file is being used for products or variants, and it won’t display any references if the file is being used in your Online Store within your themes.
If you have used a media file (image, video, 3D) in your theme section or other parts of your online store, removing the file will cause it to disappear from your store. Therefore, be extremely careful when doing so.
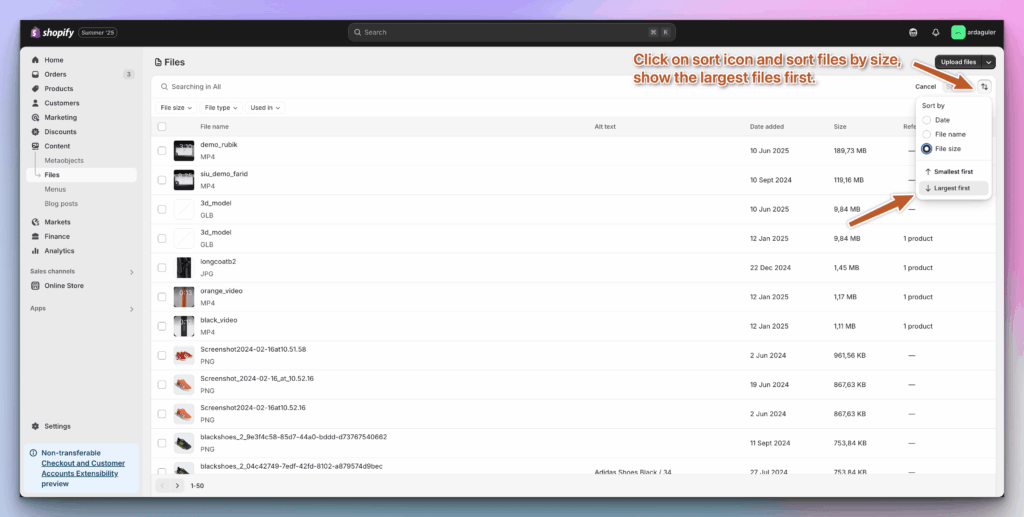
Step 2: Sort files by size. This will help you focus on the largest files first, creating the most significant impact.
Step 3: Filter files by Reference by clicking on the Used In filter and then selecting the “Other” option. This will help you eliminate files that are used in your products.
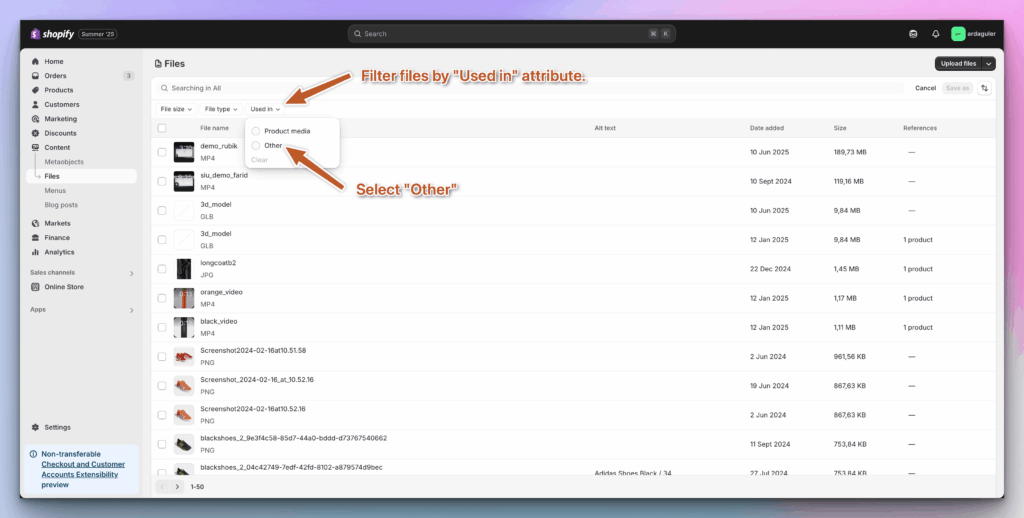
After applying the “Used In” filter, you will be left with files that are not used in your products. But you still don’t know if they have been used in your Online Store somewhere. Unfortunately, there is currently no way to check this automatically. So you will have to make a decision manually. Since you sorted files by largest first, you can start making decisions, starting with the most impactful ones on your storage usage.
Okay, let’s assume you’ve removed files that are no longer in use, but you still have storage issues. Let’s explore other alternatives.
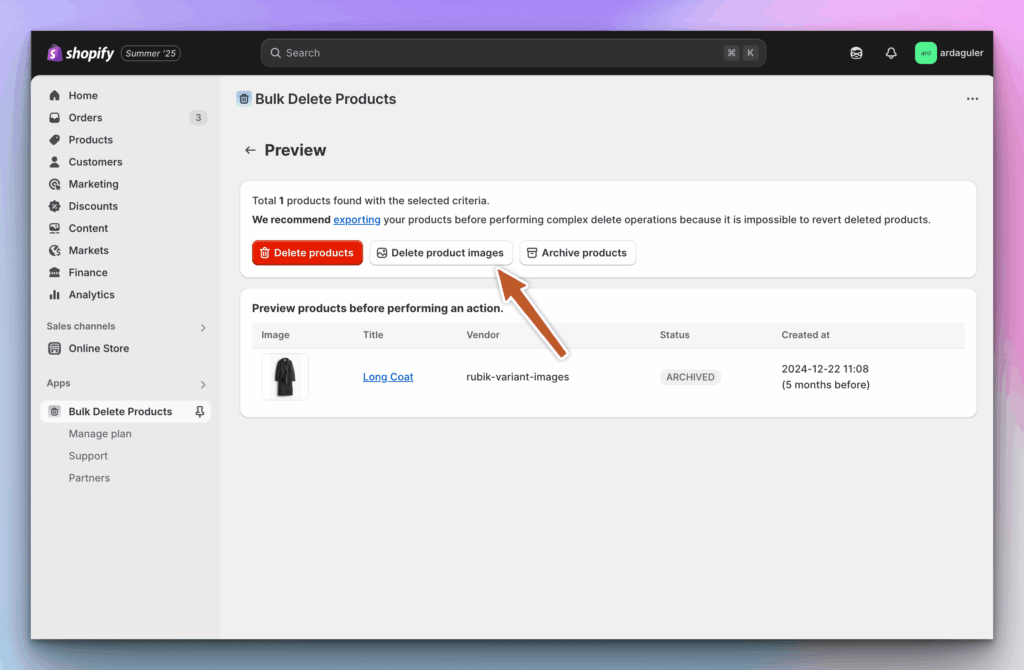
Step 4: Bulk delete media from products that are no longer needed in your store. These can be archived products that are no longer available for restock, or simply products that you know are no longer needed. Install the CS ‑ Bulk Delete Products app from the Shopify App Store. Then, filter the products by the specified criteria to identify unnecessary ones. Next, click on “Delete product images” to remove all media associated with the product.
After deleting images, you can also delete products. This will help to open up some space, as well as free up products, and utilize your storage. Since they are not necessary, they can be easily removed.
⚠️ When you delete products, you may have some 404 issues, and you can solve this problem with the Shopify app called Redirect Ninja ‑ Easy 404 Fix – Redirect Ninja Website
Unfortunately, there is no fully automated solution to address the storage problem, and it remains a time-consuming task. I hope some of the solutions suggested here will make this task a little bit easier for you.
Update: It appears that Shopify has added support to show if files are in a theme, so if you save the theme, it should update the list. I suppose it’s not backward compatible, so you’ll need to save your theme for reference to appear in the list.