While managing many images for your business, image names can be a huge problem. Especially when using automated systems, they shall be in a format, and if you get the images from another resource, you may need to update them in a bulk way.
Unfortunately, Google Drive or other storage solutions don’t help with bulk renaming. So, you need to handle it on your computer. There are easy solutions for both Macbooks and Windows. In this blog post, I’ll try to explain them.
How to bulk rename in Macbook
It’s a bit easier to bulk rename image (file) names on a Macbook. So let’s start…
Step 1: Download images onto your computer.
You can skip this step if you have the images on your computer. But if you don’t have them on your computer, you need to download them, and downloading them as a folder will make it easier to manage the process.
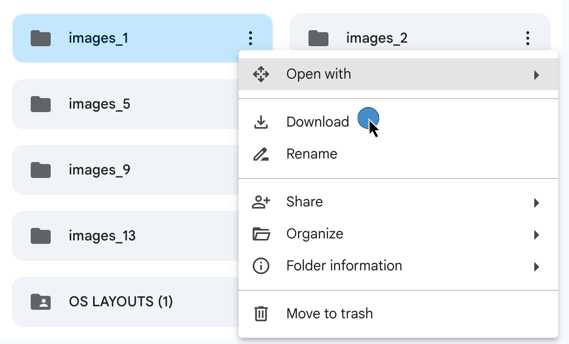
On Google Drive, click on the 3 dots near the folder name and click “download.” Then, it will start downloading automatically.
Step 2. Select the images (files) you want to rename
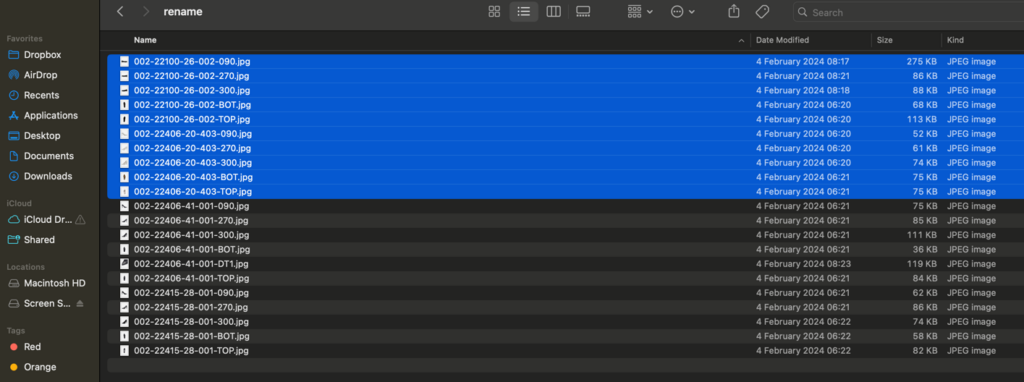
Now you have the image folder on your computer. Ideally, it would be easier to rename all images in the process, but if you only need to rename some, you must select this group first.
Step 3. Find a logic to rename all image names at once
We also selected the images or files we wanted to rename in bulk. So, only the part of finding rename logic is left. then the computer will do it. In my scenario, these image files will be used in Smart Bulk Image Upload because I want to upload them into my Shopify store. (You can check the following URL for bulk uploading product images into Shopify) And the app has a logic for image ordering. It accepts imagename_1.jpg/png/tif/webp as 1st image, _2 as the 2nd image, and _3 as 3rd, and I need to find logic to bulk rename my images.
According to current image names, images ending with;
- 270 are the 1st images of related products,
- 300 are the 2nd,
- 090 are the 3rd,
- TOP are the 4th,
- BOT are the 5th,
So, if I can change all of them as ;
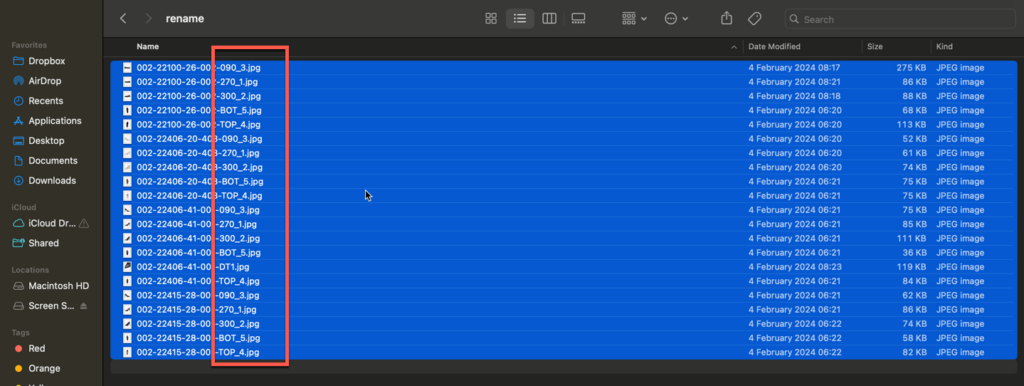
- 270_1.jpg
- 300_2.jpg
- 090_3.jpg
- TOP_4.jpg
- BOT_5.jpg
they will be ready for my scenario.
So, let’s rename them in a bulk way. I’ve already selected the images I want to rename, so I’ll right-click with my mouse and select “rename” from the menu.
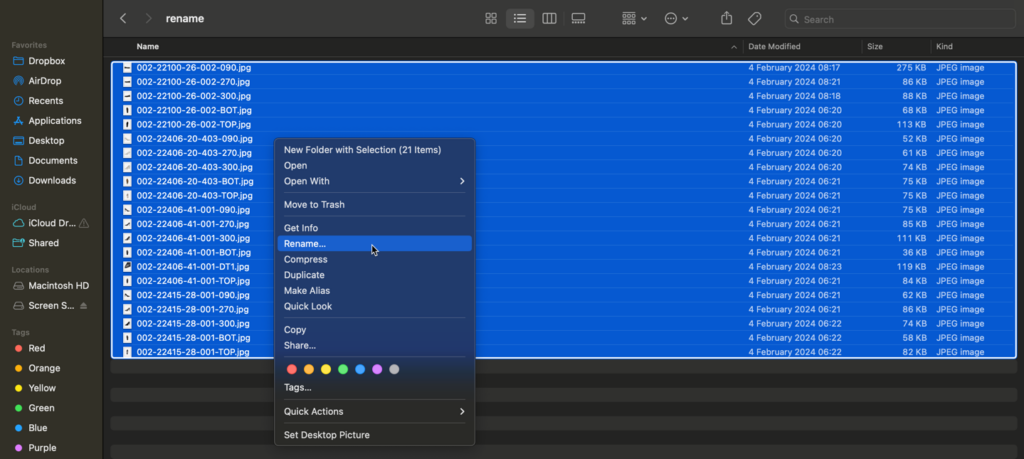
Then, the operating system will show you the following options with find and replace with fields;

You need to fill these fields with the inputs from your logic. In my logic, images that end with 300 are 2nd images, and I need to set them as 300_2. Therefore, I fill them;
- find part as “-300.jpg” (I don’t write only 300 because there can be some other 300s in the file names)
- Replace with part as “-300_2.jpg”
and click on rename. After completing the same process for 270s, 090s, TOPs, and BOTs, my file names will be updated in a few minutes, as you can see below.
Step 4. Upload them into Google Drive or other storage solutions you use.
Our images are ready now; we can use them with the expected naming. Since I’ll use them with Smart Bulk Image Upload, I need to upload them into Google Drive again, but if you use them from your computer, you can skip this step or upload them into another storage solution.
How to bulk rename in Windows
Actually, it’s almost the same as the Macbook solution, but the only difference is Windows doesn’t allow users to make this process with a native Windows solution; therefore, you need to download the PowerRename tool.
Step 1: Setup the PowerRename tool into your Windows
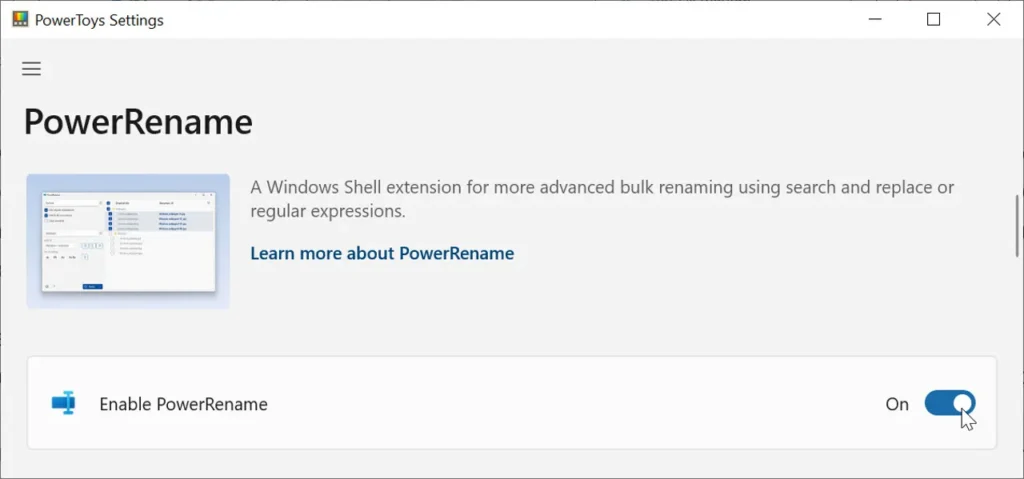
When you install the extension and click on its icon, this page will be opened, and you need to click on “enable PowerRename”
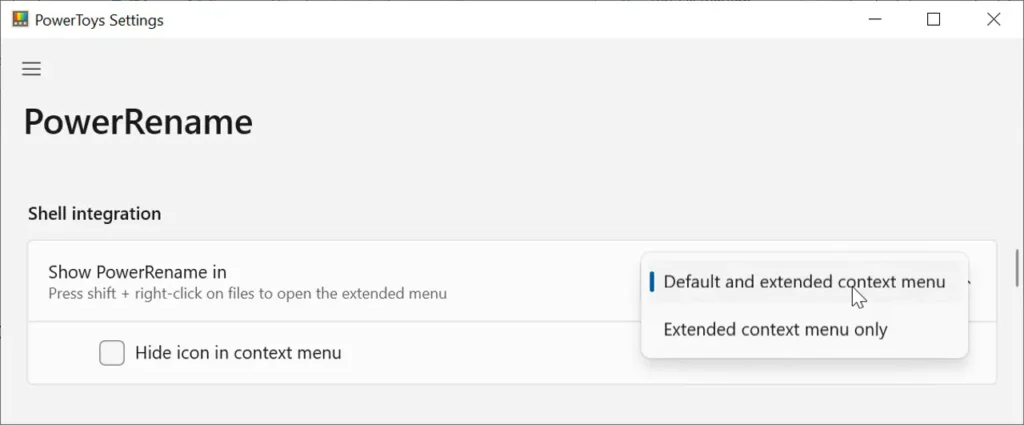
then, you will choose the “Default and extended context menu”
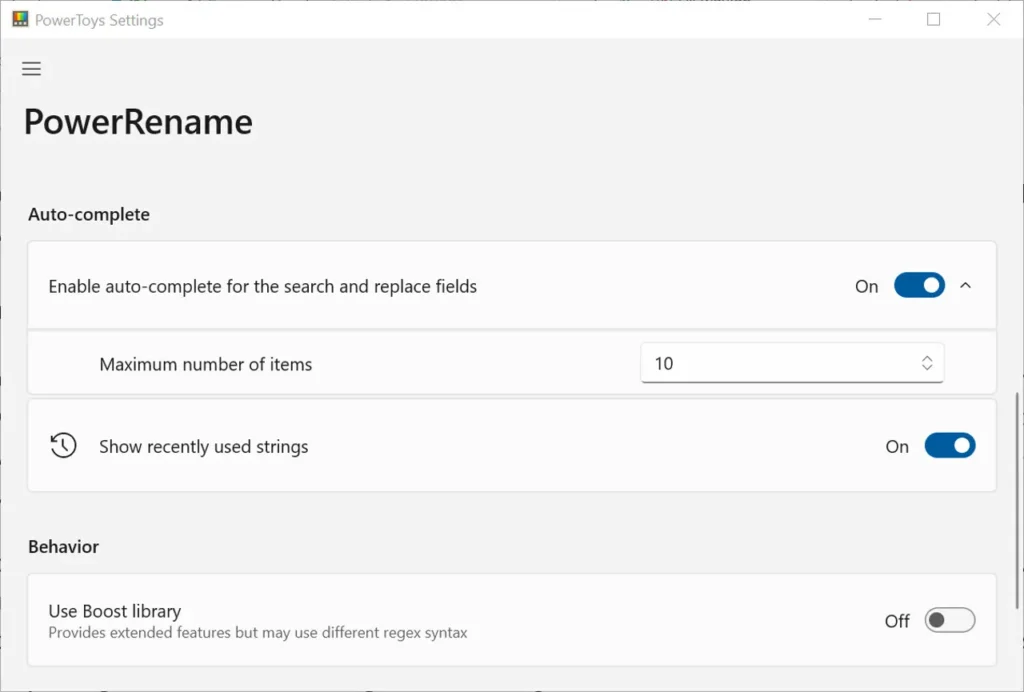
And enable other options. At this point, I suggest you set the “Maximum number of items” according to the number of images that you want to rename.
Step 2: Select the images (files) you want to rename
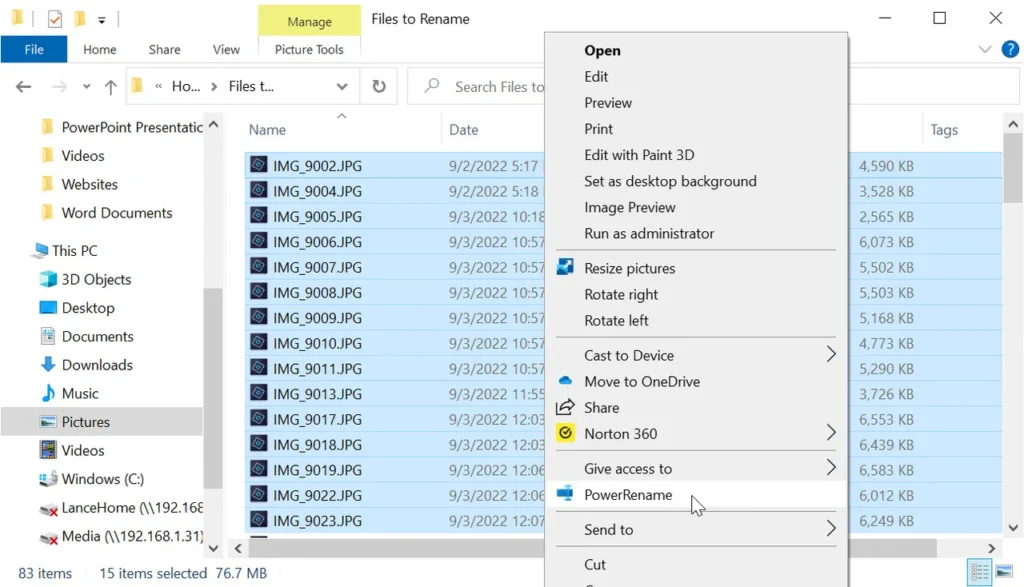
Ideally, it would be easier to rename all images in the process, but if you only need to rename some, you must select this group first, right-click with the mouse, and select “PowerRename” from the menu.
Step 3: Find a logic to rename all image names at once
Now, you will see the selected images in the PowerRename screen, and you need to fill the “find” and “replace with” fields with the inputs from your logic.
When you make the changes, you will see both the original and renamed versions of your images on the screen.
If everything seems good, you’re ready to click “Apply,” and bulk rename image (file) names according to your need.
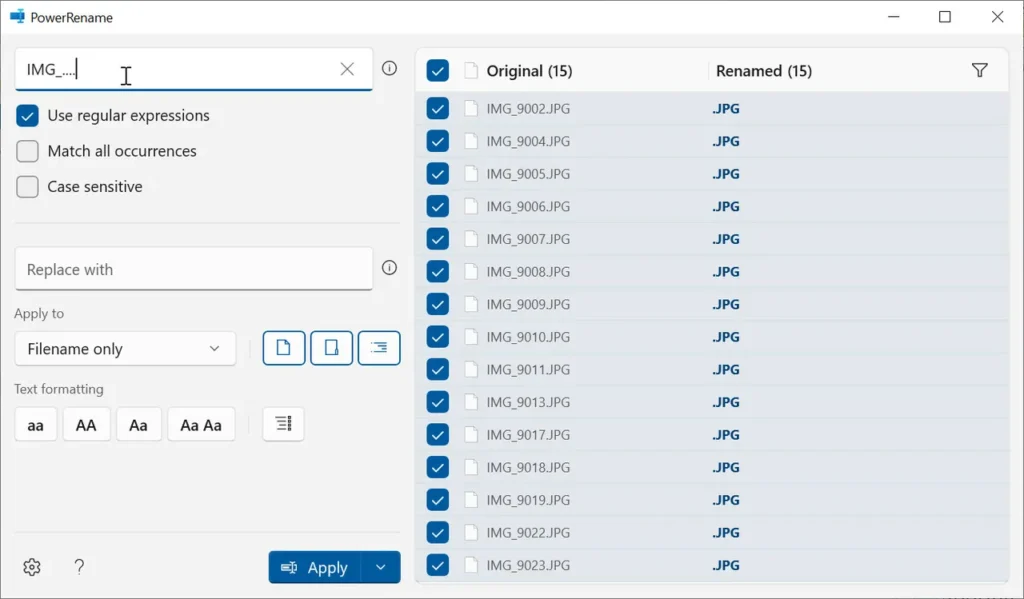
Since I don’t have a Windows computer, I couldn’t get the screenshots on my own, so I used the screenshots of Lance Whitney. You can also check his post from here.
If you want to check details of bulk uploading product images, you can check the link.


