Managing a growing product catalog on Shopify is exciting, but uploading thousands of images manually? Not so much with Smart Bulk Image Upload.
As Craftshift, we create solutions for e-commerce businesses with tools that save time and automate operations. In this guide, we’ll show you exactly how to bulk upload product images on Shopify using the Smart Bulk Image Upload app. Whether you’re dealing with 50 products or 5,000, this tutorial will get your store visually optimized in minutes.
Install Smart Bulk Image Upload
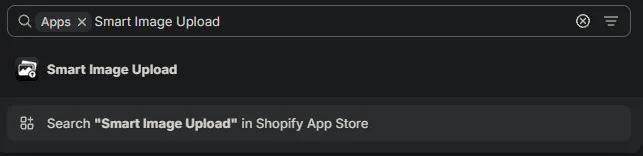
- Go to the Shopify App Store and search for “Smart Bulk Image Upload.”
- Click Install.
- Open the app from your Shopify dashboard under the Apps section.
Step 1: Connect Your Cloud Storage
To simplify file handling, Smart Bulk Image Upload allows you to sync with:
- Google Drive
- Dropbox
How to Connect:
- In the app dashboard, click Connect.

- Choose your preferred cloud provider (Google Drive is the default, but you can change it to Dropbox in the app settings.)
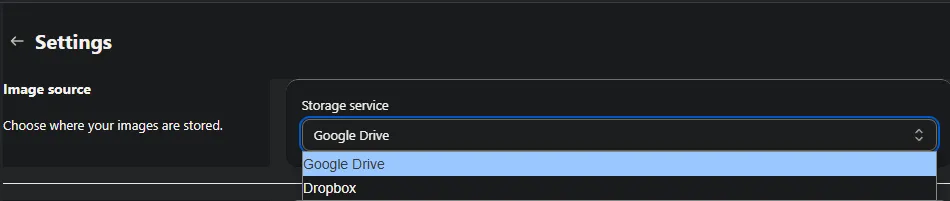
- Authenticate your account and authorize folder access.
Your cloud folders will now be accessible directly within the app for bulk selection. If there are lots of folders and you want to sync only a specific folder’s subfolders, then you can write to Support, and we can make a customization to fetch only the subfolders of this specific folder.
Step 2: Prepare Your Image Files
Follow a consistent naming convention to automate matching. Common formats include:
- SKU123_1.jpg : You can also add _1, _2, etc. after the identifier to indicate image position (e.g., main, alternate views, lifestyle images, etc).
- product-title-main_1.jpg : Use underscores and numbers to control the order images appear.
- barcode123456789_1.jpg : App reads underscores and trailing numbers to set image sequence automatically.
Tips:
- Organize images in folders based on products.
- Keep filenames short, clear, and descriptive as soon as they are same or containing SKU, Barcode, Title or metafield that you want to match, the app handles the rest.
Step 3: Choose Your Matching Type
This is where the real power of the Smart Bulk Image Upload app comes in. Choose one of the 12 matching modes to auto-pair images with the correct products or variants:

SKU Matching
- Exact SKU: Filename matches product’s SKU exactly, e.g., ABC123_1.jpg, ABC123_2.jpg for ordered images where SKU is ABC123. Use underscores (_) followed by a number to specify the display position of images for the same product (e.g., _1 for main image, _2 for alternate, etc.).
- Image contains SKU: SKU appears anywhere in the filename, e.g., product_ABC123_view1_1.jpg. Here too, app recognizes _1, _2 to order images.
- SKU contains image name: Image name is part of the SKU, e.g., shirt123_1.jpg → SKU: newshirt123. Ensure you still append numbers if you want to control image sequence.
Image Naming Tips for SKU Matching:
- Always include the SKU exactly as it appears in Shopify.
- Use underscores to separate the SKU and the position number.
- Position numbers (_1, _2, etc.) tell Shopify which image is primary and which are secondary.
- Example set: SKU001_1.jpg (main), SKU001_2.jpg (back view), SKU001_3.jpg (close-up).
Barcode Matching
- Exact Barcode: The image filename must exactly match the product’s barcode. Example: 0123456789.jpg matches a product with the barcode 0123456789.
- Image contains Barcode: Barcode digits appear within the image filename. For example, promo_0123456789.jpg.
- Barcode contains image name: The image name is a substring of the product’s barcode, e.g., image blue1.jpg matched to a product with barcode blue123456789.
Product Title Matching
- Exact Title: The image name matches the product title word-for-word. A product titled “Classic Red Tee” should be paired with Classic Red Tee.jpg.
- Image contains Title: The product title is found within the image filename, such as Classic Red Tee front.jpg.
- Title contains image name: The image name is embedded in the product title. For example, image denim.jpg could match a product titled “Stretch Fit Denim Jeans”.
Metafield Matching
- Exact Metafield: Filename matches a product or variant metafield value exactly, e.g., vendorCode123_1.jpg, colorBlue_2.jpg.
- Image contains Metafield: Metafield value appears anywhere in the filename, e.g., product_vendorCode123_alt_1.jpg.
- Metafield contains image name: Image name is part of a metafield value, e.g., golden_1.jpg → metafield: golden_variant_2024.
How to define and use metafields:
- Go to your Shopify Admin → Settings → Custom Data → Products (or Variants if you prefer variant-level metafields).
- Click Add Definition and define a metafield with a name, namespace, key, and content type.
- Fill in metafield values for your products or variants accordingly.
- In the Smart Bulk Image Upload app settings, specify which metafield namespace and key(Product or variant ) the app should use when matching.
Decide whether the metafield should apply to the product level or variant level based on your needs.
You can also use underscores and numbers here to indicate image order, just like in the other matching modes.
Tip: Using metafields improves your product data structure and helps with SEO indexing.
Step 4: Preview Your Matches
Before committing:
- Preview Match to see which images are correctly mapped.

- If there is a false match you can unmatch it.
- Make manual adjustments if needed. (Hopefully you won’t 😊)
What Could Go Wrong?
Even with smart matching, mismatches can happen if filenames and product data don’t align. Examples:
- Images with typos in filenames (e.g., abcD123.jpg when SKU is abc123) won’t match. Since image name has an extra D.
- Images without any recognizable identifier in the name remain unmatched.
- Multiple products accidentally share the same SKU or barcode app might assign one image to multiple products unexpectedly.
- If you forget to set the correct metafield namespace/key in the app settings, metafield matching will fail.
Always use the Preview Match step to spot and fix these issues before uploading.
Step 5: Execute the Upload
Once you’re confident in the preview:
- Click Start Upload.
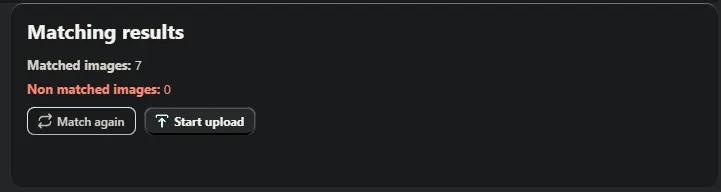
- The app will process and assign each image based on the chosen matching mode.
- A real-time progress bar shows success/failure counts.
Tip: Use batch uploads daily to keep your product visuals fresh and relevant.
Step 6: Optimize and Iterate
After uploading:
- Delete unused or duplicate images from cloud storage.
- Refine your naming conventions based on match results.
As Craftshift, we focus on ecommerce automation that improves accuracy and efficiency. Smart Bulk Image Upload is ideal for:
- Newly launched stores that need to upload all product images at once and make a great first impression. Example: A boutique fashion store launching its first catalog can upload all seasonal lookbook images in minutes.
- Stores doing seasonal updates (e.g., summer/winter collections) where many images need replacing quickly. Example: A home decor shop switching from holiday to spring collection overnight.
- Stores with frequent campaign or promotional changes, like flash sales. Example: An electronics store updating banners and product images for a Black Friday sale.
Integrating this tool into your workflow not only saves time, but it also supports SEO through improved metadata, and image alt texts, and enhanced user experience.
Bulk uploading images to Shopify no longer has to be a bottleneck. With Smart Bulk Image Upload, you can automate this repetitive task and reclaim hours every week. As Craftshift, we’re here to make sure every image you upload brings you one step closer to ecommerce excellence.
Want more optimization strategies? Visit craftshift.com for more Shopify automation tools and expert tips.