How to bulk assign variant images on Shopify
Shopify processes one image at a time when assigning variant images within a product. This means opening a product, selecting a variant, choosing an image for it, and saving the product before moving on to the next variant. For a product with 8 variants and 4 images per variant, this requires 32 manual steps. For a catalog with 100 such products, that would be 3,200 manual steps, far from a workflow and bordering on torture.
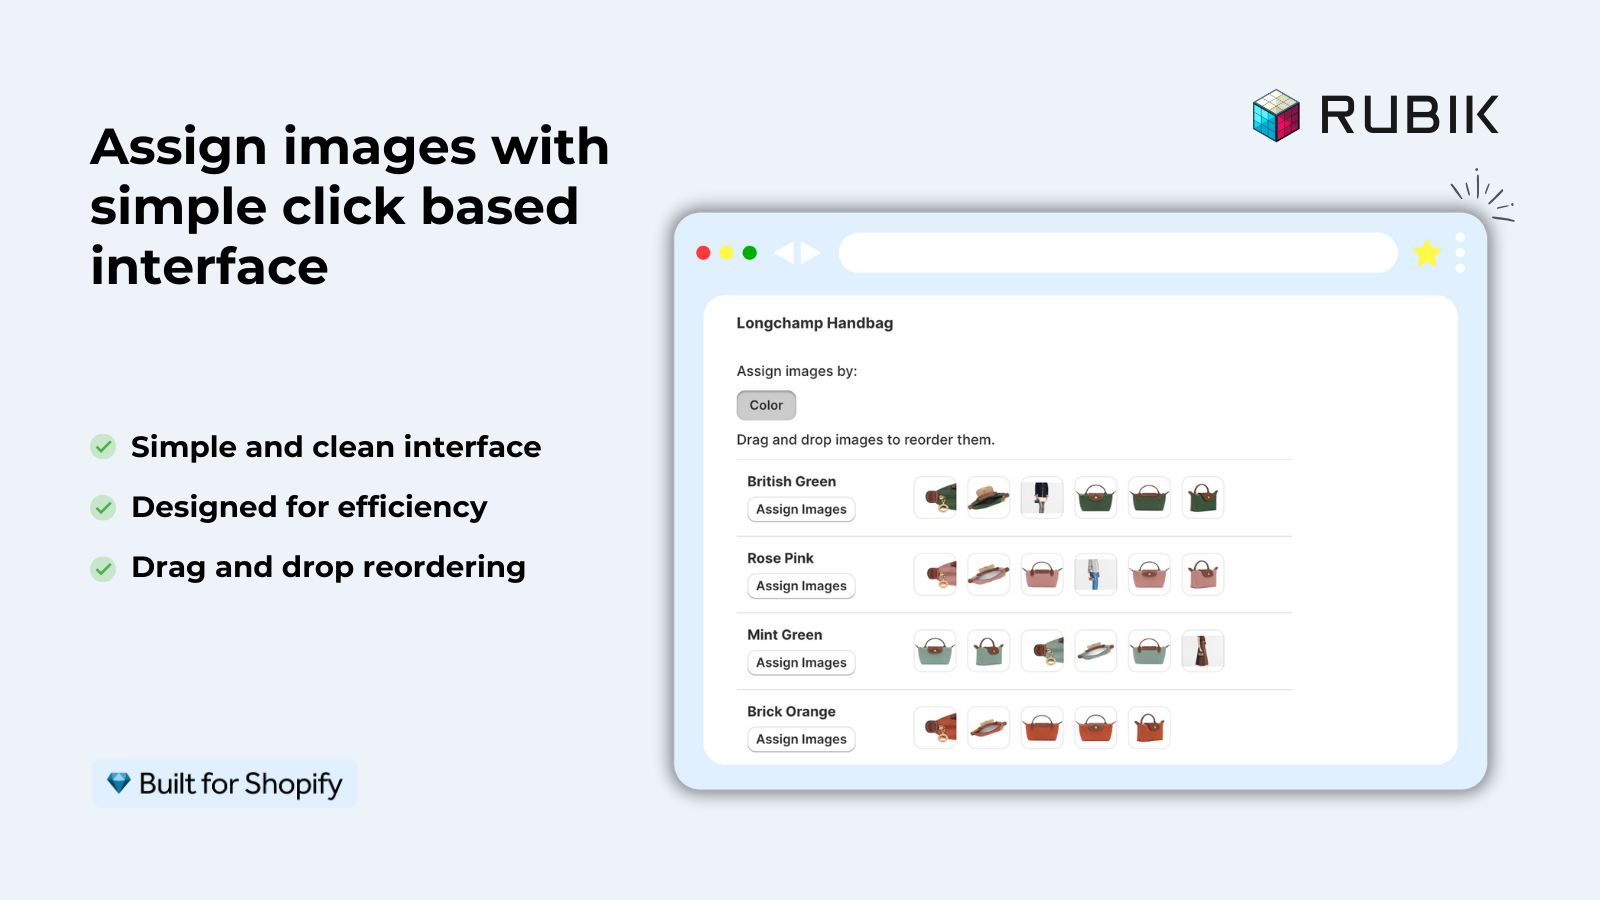
Bulk assign: Actually take a hands off approach to assigning images. Assign based on the order your images are presented in in your product gallery. So simply organize your images in your gallery in the same order as your variants. Upload, click bulk assign and have all of your images automatically assigned in seconds.
In this post
- How bulk assign works
- Setting up the right gallery order
- Bulk assign vs AI auto-assign
- Handling shared images during bulk assign
- Best practices
- FAQ
How bulk assign works
In Bulk assign in Rubik Variant Images, images are assigned to variants based on the position in the product’s gallery. Images are assigned based on the featured image for each variant, and then grouped by those featured images.
If you upload a product with 3 colours (Red, Blue, Green) and each colour has 4 images (front, back, details, lifestyle) making a total of 12 images, uploaded in order (4 red, 4 blue, 4 green – see gallery above), the software will detect the boundaries and BULK ASSIGN will allocate accordingly (4 red images, 4 blue images and 4 green images). However, if you upload them mixed up, the software will still detect the boundaries but BULK ASSIGN will again allocate in batches of 4.
- Images 1 to 4 → Red variant
- Images 5 to 8 → Blue variant
- Images 9 to 12 → Green variant
Bulk assign product variant images to Shopify collections based on the first image of each group of similar products. This method also assumes that the first image of each group has been marked as the featured image for that variant. Shopify Bulk assign uses the featured image boundaries to understand where one product’s images end and another’s begin.
Unlike AI auto-assign which looks at the filename and alt text of individual images, bulk assign looks at no image content whatsoever, but only at the position of images within a folder, which makes it faster, but will work even if the filenames are completely generic and don’t describe what is in the images.
Setting up the right gallery order
Bulk assign accuracy depends entirely on gallery order. Before running it, make sure your product gallery follows this structure:
- Group images by variant. All red images together, then all blue, then all green. Do not mix colors in the gallery.
- Same number of images per variant. If red has 4 images, blue should have 4 too. Uneven counts can cause misalignment where a blue image gets assigned to green.
- First image of each group is the variant’s featured image. Assign the featured image for each variant in Shopify’s product editor before running bulk assign. The app uses these as boundary markers.
To change the order of uploaded images in your Shopify product view, simply go to your product, view in the media section the individual images, and “move up” those that need to appear earlier and “move down” those that need to appear later. The images will be saved in the new order.
Bulk assign vs AI auto-assign
| Feature | Bulk assign | AI auto-assign |
|---|---|---|
| Matching method | Gallery position (order-based) | Filename, alt text, variant name |
| Requires descriptive filenames | No | Yes (for best accuracy) |
| Processing | Background, batch across products | Per-product, requires review |
| Best for | Organized galleries with consistent image counts | Products with descriptive filenames |
| Speed | Processes many products at once | Seconds per product |
| Uses AI credits | No | Yes |
When your gallery is already well organised and each variant has an equal number of files with generic file names then use the tool for “bulk assign” function. On the other hand, if you have files with descriptive names and unequal number of files per variant or in case the gallery is not in proper order, then use the tool for “AI auto-assign” function.
Handling shared images during bulk assign
Make sure to mark any Shared images (such as size charts or lifestyle shots) before running bulk assign. If you upload all the images to the gallery but don’t mark the Shared ones, then when you run bulk assign, the algorithm will try to assign those to variants, and mess up your position-based grouping.
Best Practice: Shared images should be placed at end of gallery after variant images. Rubik Variant Images app should mark these as “Shared”. If bulk assigned, these will be skipped by gallery images in favour of processing the variant images only.
Best practices
- Always set featured images first. Assign one featured image per variant in Shopify’s product editor before running bulk assign. These serve as the boundary markers for image grouping.
- Keep image counts consistent. If most variants have 4 images, make sure all variants have 4. Pad with additional angles or crop variations if needed.
- Check results after bulk assign. Open a few products and verify the assignments are correct. One misaligned gallery can cascade into wrong assignments for subsequent variants.
- Use for new products, not corrections. Bulk assign works best when setting up a new product with images already organized. For products with existing incorrect assignments, AI auto-assign or manual correction is better.
For listings where each color is separate and grouped with Rubik Combined Listings (ie. grouped on the store product page) like in the example above (For 3 products with (3) colors each = 9 listings total), it is easier to bulk assign the product image gallery since each product has fewer images since only one color has images assigned. Additionally, since the gallery is of the same product, the correct gallery order is established since all images are for the same color.
“Excellent support from Zulf. I tried several different apps before this one that were buggy or simply did not work. I was please to see that these guys got me up and running quickly!”
mimish, inc., US, 2026-04-06, Rubik Variant Images on the Shopify App Store
Frequently asked questions
Does Shopify support bulk image-to-variant assignment natively?
No. One variant at a time can be natively assigned on Shopify. Bulk assign of images is a feature of the Rubik Variant Images app, it automatically assigns images using gallery order based on the order of images in the gallery.
What if my variants have different numbers of images?
Uneven image counts can cause misalignment (e.g. Red has 4 images, Blue has 3, 4th image would be assigned to Blue instead of Red). Uneven counts are handled more accurately by AI auto-assign (which looks at filenames, not position).
Can I run bulk assign across many products at once?
Yes. With our new app, Bulk assign processes products in the background. All you do is select the products you want to process, then start the bulk operation. It will then auto-assign images to the products based on the gallery order of the products. No per product review or tagging required, unlike with our AI auto-assign feature.
Does bulk assign use AI credits?
For bulk assign, the rules refer to position-based rules and NOT AI rules. Therefore, no AI credits will be used regardless of your subscription plan. Only the AI Auto-Assign function consumes AI credits. Bulk Assign Help
How do I handle shared images like size charts during bulk assign?
Mark 7 images in Rubik Variant Images as ‘shared’. Move them to end of gallery and put at end during bulk assign process. They are skipped by the bulk assign process in favour of variant specific images.
Related reading

Umid
Co-Founder at Craftshift