How to Group Product Variant Images on Shopify Store?
When displaying images for grouping product variant images on Shopify you only want to show the customer the relevant images when they select a particular variant. By default Shopify doesn’t allow you to do this, and will display all product images for every variant. Without a variant image app, you can usually arrange your images in the correct order to get it working, or look into adding custom code to sort the images manually. There are also plenty of apps available that can help you achieve this.
Customer came to us on a Friday night with 800 products and 12 colors per product-all 800 products with all 96 images displaying. Customers were scrolling through an enormous gallery just to confirm the product they were looking at was the correct shade of blue. Returns through the business were incredible because customers couldn’t even identify which images belonged to which variant.
This guide covers the native, shopify method (free, but with some limitations) , followed by the image ordering trick, then manually rearranging with an app, and finally, bulk assigning by gallery order for large product pages with lots of images. We’ll see how each approach can fall over, and which one really works for a very large number of galleries.
In this post
- Why Shopify doesn’t group variant images by default
- The native Shopify approach (and its limits)
- Image ordering: the manual trick
- Manual drag-and-drop assignment
- Bulk assign by gallery order
- AI auto-assign for complex products
- Which method fits your catalog
- FAQ
Why Shopify doesn’t group variant images by default
Shopify allows you to add one image per variant. One. If you have a mens fashion product that comes in three colours and you have five photos of the black, 5 photos of the blue and 5 photos of the grey, then Mr Photo uploading all 15 photos, Shopify will still display all 15 photos regardless of variant. The one image per variant setting simply means that only one of the 15 images will be ‘featured’ when the customer clicks on the black, blue or grey variant option, not that only 1 image will show for the product.
This is the number one complaint from merchants selling products with visual variants. Apparel, furniture, jewelry, cosmetics, home decor, etc.–anyone with color or material options and multiple photos per variant hits this wall.
Why doesn’t Shopify fix this natively? I don’t know, but variant images are organized by variants so you should make a shop app to group them. Kind of annoying that shopify doesn’t have this feature already, but since they don’t, it gets left to apps to do.
The native Shopify approach (and its limits)
Shopify natively allows you to assign a variant image to a product. One image can be set to display as the primary image for a variant when browsing product variants. The other images in the product gallery remain visible, but will not move to the front of the gallery when selecting a different variant.
This works fine for an 1 photo per variant, eg, one front image per colour. But most stores require at least 3 images per colour, front/back/lifestyle or front/detail/on-model etc. So this is not enough for most shops.
Why limit variant? If you’re interested in a deeper look at the story behind variant limits on Shopify, check out the 2026 variant limit guide. If you have a huge product catalog with multiples images per product variant, also check out that guide for a step by step overview of how to manage everything.
Image ordering: the manual trick
Did you know that BEFORE apps existed to do this for merchants, there was a super simple way to display products in a gallery that STILL WORKS TODAY! That trick (used by merchants before apps) is to arrange the product images so that all images for ONE VARIANT are grouped together, with the “featured” image FIRST in that group.
For a product with Red (3 images) and Blue (3 images), the gallery would be ordered: Red-front, Red-back, Red-lifestyle, Blue-front, Blue-back, Blue-lifestyle. Then the Red-front would be set as the variant image for Red and the Blue-front would be set as the variant image for Blue.
When you click on “Blue” in the customer gallery it should take you to the first Blue-front photo. Instead, all of the blue images follow in a row, but you can still see all 6 images of the gallery and go back up to the red images. This is a workaround, not a solution.
This method does not scale. Trying 12 colors and 5 images each, results in sixty images in one gallery, which has to be manually reordered. One drag-drop error and the whole thing falls apart. You should not have more than a handful of products online using this method.
Manual drag-and-drop assignment
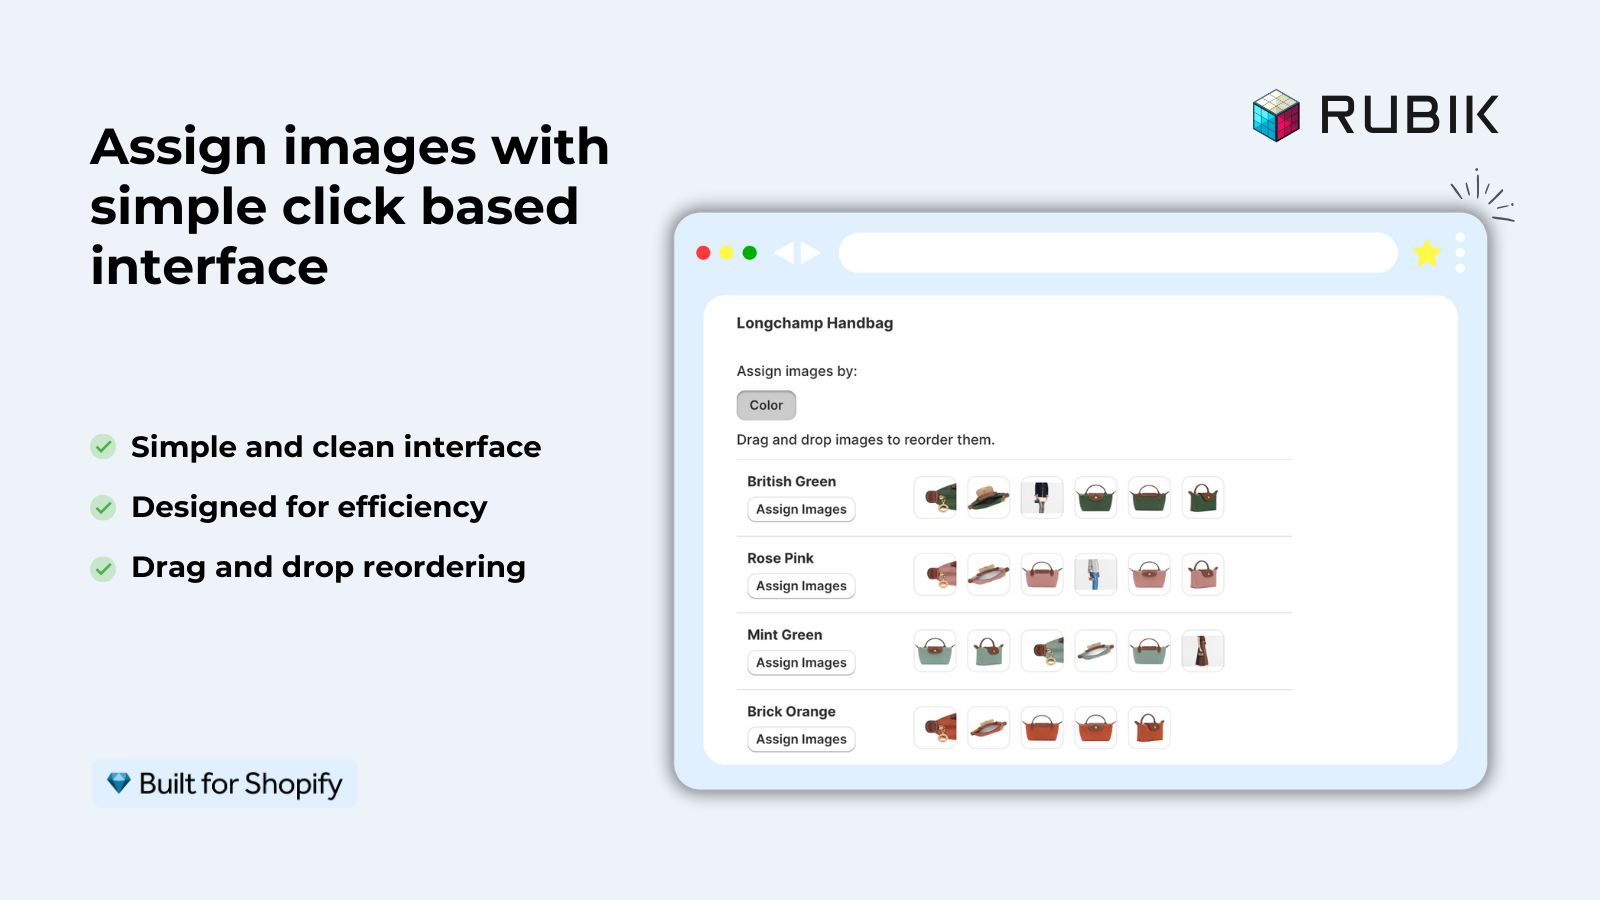
Variants images for products, can take a huge amount of space in the product variant section. That is unless you have a variant image app. Some of these apps allow you to add multiple images for a single variant in a very user-friendly interface. For example, you can select a variant and add corresponding images for that variant until you’ve added all the images you need for that product. You can even upload more images later, for any variant. The customer will only be able to view the images you assigned to that specific product variant when shopping on your online store. The customer will be unable to view images of other product variants.
Rubik Variant Images allows you to easily show different versions of a product image. Manage all the blue images on the blue side of the drag-and-drop editor and compare that to the Blue variant on the right. Easy to use and supports more than just photos (images, videos, 3D models etc) and works on the product page with 350+ themes supported.
Manual assignment is perfect for small to medium sized stores with less than 100 products in their catalog. This method gives you the most control as you can assign images on a per product basis, making sure that exactly the image you want is in the exact spot you want it. However, as you can imagine, this can be very time consuming and could take a while for a store with 500 products. This is not something you want to have to do for each individual product.
“This app was exactly what I needed! I was about to start adding alt text to every single image, and came across this option that is SO easy and intuitive to use.”
Elizabeth Suzann, Rubik Variant Images review, Shopify App Store
Bulk assign by gallery order
Manual assignment just isn’t scalable for large product catalogs. The bulk assign feature within the Rubik Variant Images app enables you to assign product images to variants by using the existing gallery order you’ve established within your Shopify store and then organizing the images by variant in sequence.
.bulk_assign how it works: Each media (image) type (such as featured image) is treated as a boundary between product variants. So all images that follow until the next product variant would get assigned the value of the options for that variant. See example above ( How gallery is organized) and how .bulk_assign would automatically assign groups for you.
This isn’t AI-powered! Bulk assign uses image-order based grouping and automatically processes products in the background for hundreds of products at a time. No filename matching, no calls to external AI services. Simply upload products and have the gallery sequence automatically organize for you.
This would be so easy if bulk assign could straighten out a mixed up gallery for you! The key requirement is that your gallery must be in the right order before you run the plugin. So, you would group the red images together, then the blue images together and set the first image in each group as the featured image for that variant. So, a little initial sorting would be required but then bulk assign would do the rest.
AI auto-assign for complex products
Some products don’t have clean gallery ordering and can end up looking messy due to images being uploaded in a random manner or images being grouped by certain options (such as color and then material for a product).
Rubik Variant Images allows for AI powered auto-assignment of images to the proper variant. The system will look at 5 data points per image (product title, option values, option name, image filename and alt text) in addition to actually looking at the image through a vision API. The AI will then determine which images belong to which version of a product and it will auto-assign 1 product at a time. Every plan includes monthly AI credits (the amount varies by plan tier).
: Different from “bulk assign”. With AI “auto-assign” products are assigned tags on an individual product basis. This uses image recognition technology to classify images. Bulk assign on the other hand uses tags to classify based on gallery order. So if your gallery order is messy you might prefer to use AI’s “auto-assign”. If your gallery order is clean you can just use “bulk assign”.
– The color swatches complete guide. This is a post that covers all the different swatch types, and how you can customize each one. This post may also mention collection page swatches, but those are a totally different feature: see Rubik Combined Listings for more on those.
Which method fits your catalog
Three methods, three scenarios:
- Under 20 products: Manual drag-and-drop. Open each product, assign images, done in an afternoon.
- 20 to 500 products with sorted galleries: Bulk assign by gallery order. Sort your images once, run bulk assign, review the results.
- Messy galleries or complex multi-option products: AI auto-assign per product, then switch to bulk assign for new products going forward.
Most product galleries will land in a pretty good place by color with a quick sort. Rather than going through each product individually, you can bulk assign them all at once (the app reads gallery order and groups images by variant boundaries). This only takes about 10 minutes to complete for a 200-product catalog. From there you can continue to fine-tune individual products that need adjustments.
If you have a lot of images to upload before you’ve assigned the variants, You should read the bulk image upload guide first. Sorting everything out before you upload will save you having to re-sort everything later. This is especially true for stores that list separate products for each color instead of using variants. See Combined Listings for a trick for organizing these products so that each color has its own URL.
“Great app, works great! When I needed guidance with the set up, Umid responded in the service chat immediately, knowledgable, helpful, and a real human!!”
Rubik Variant Images review, Shopify App Store
FAQ
Can I assign multiple images to one variant on Shopify?
No, by default Shopify allows for one image per variant. Apps, such as Rubik Variant Images, exist to display multiple images per variant, and would group and filter a gallery based on the chosen variant.
What is bulk assign by image order?
Bulk assign reads your Shopify gallery order and uses the featured image of each variant as a break point. All images between a given variant and the next will be assigned to that variant. It makes short work of hundreds of products in the background.
Does bulk assign use AI or filename matching?
No the default method is image-number order, and is based on gallery and page boundaries of featured images, and does not involve any AI or analysis of image file names. There is an optional mode where you can choose to run this function with AI assistance.
How many images can I assign per variant?
No limit. Shopify product galleries can hold as many products as you like, and each product can hold up to 250 images. So long as there are product variants for an image, it can be assigned to a specific version of a product.
Do variant image apps work with videos and 3D models?
Rubik Variant Images allows you to add images, videos and 3D models for the different variants of a product. The customer will only see the media that matches the chosen variant.
What about collection page variant swatches?
Rubik Variant Images works on the product page and, since May 2026, also shows product card swatches on collection and listing pages for a single product’s variants. For collection swatches across SEPARATE products grouped together (each color its own product and URL), Rubik Combined Listings is what you need. Many stores run both.
Related reading
- Shopify variant images complete guide
- Shopify multiple images per variant
- Color swatches complete guide
- Rubik Variant Images FAQ
- Combined Listings explained
Demo store: See the live demo store. Video tutorial: Bulk assign walkthrough on YouTube. Docs: getting started guide.

Umid
Co-Founder at Craftshift